I am linking up with 4th Grade Frolics for my first Monday Made It!
I pinned this craft over a year ago from Classroom DIY. I made a few last summer and last year's class loved them. They would use the clipboards every chance they could. The problem was I only made 8. Not nearly enough for a class of 26. So this summer I am making more. Hopefully enough for an entire class.
Here is what you need: a clipboard, colorful duct tape, and scissors.
Here is how I went about completing this project.
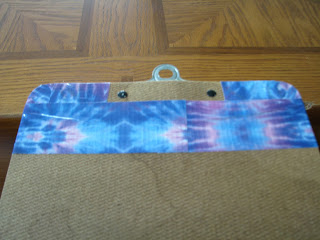
I start by covering the corners. Take squares of tape and folded it over the corners. You can see this clipboard is really beat up. It could use a face lift.
I start by covering the corners. Take squares of tape and folded it over the corners. You can see this clipboard is really beat up. It could use a face lift.
Cut a slice in each side of the fold. This will help you to bend the tape around the corners. Do this to all four corners.
Then take strips of tape and fold it over the top and bottom of the clipboard.
Now start covering the clipboard with strips of tape. Slightly overlapping as you go.
I start in the front and overlap the tape in the back.
Continue until the entire clipboard is covered.
Two down, sixteen more to go!
My son actually covered the solid blue clipboard. He did it his own way and it looks great.
Now I need to figure out how to store these lovely clipboards. I currently put them in crates but I really don't like how that looks and it takes up a lot of space. Any ideas? How do you store your clipboards?
Kim


